Move/Stretch Objects
Tool summary :
Also see :
Moving a work point and its origin symbol :
Move/Stretch can relocate a work point origin symbol and its associated work point ( o ) on any drawing, resulting in the recalculation of extension dimensions. Step 1, preselection, is optional (see note 2 ). Regardless of whether you do preselection or in-tool selection, the selection filter must be ' Default ' or ' All ' before you can select the work point and its origin symbol. Note that you can skip step 5 if User and Site Options > Drawings > "  Confirm move/stretch " is turned off. To capture the images shown in this example, "
  Confirm move/stretch " was turned on.
|
|
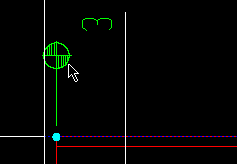
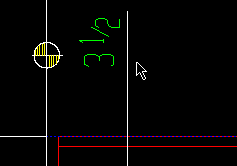
1 (optional) : Select the work point origin symbol that you want to move. Note that the work point is displayed as an end point ( o ) and is automatically selected when you click its symbol.
|
|
|
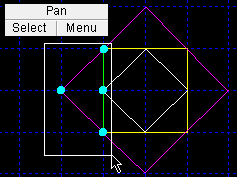
2 . Invoke Move/Stretch . If you didn't do step 1, see note 2 before going to step 3.
|
|
|
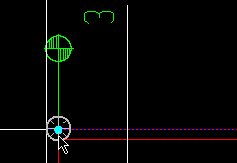
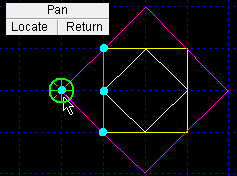
3 . Move your mouse pointer (  ) so that the point location target snaps to where you want the reference point, then left-click ( Locate ). EXPT is the Locate option used in this example. ) so that the point location target snaps to where you want the reference point, then left-click ( Locate ). EXPT is the Locate option used in this example.
|
|
|
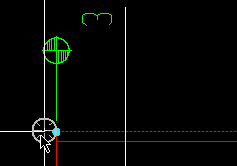
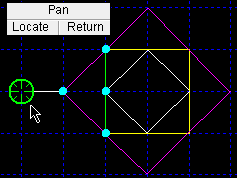
4 . The status line prompts, " Locate second point :" Position the point location target where you want the reference point to be moved, then left-click ( Locate ). EXPT is also used in this example.
|
|
|
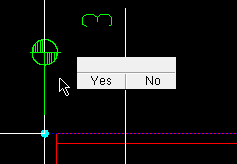
5 . In this example, you are prompted to respond whether or not you want to accept the move -- see note 3 . Yes - No mouse bindings are shown. Left-click ( Yes ) to accept the move.
|
|
|
6 . The extension dimension is recalculated since the work point it has been assigned to has been moved. Note that you can turn off this recalculation -- click here and here . You can also assign extension dimensions to different work points -- click here .
|
Step-by-step instructions :
The following instructions assume that you are using a 3-button mouse, that the User and Site Options > General > " Point location target " is set to ' Fancy ', and that you use mouse bindings similar to those shown in these illustrations.
Before using this tool:
Setup: User and Site Options > Drawings > " Confirm move/stretch " -- see note 3 .
If applicable: You should Unshorten a member detail before using Move/Stretch if you want Detail Members to later be able to correctly preserve ' User-created ' annotations. For best accuracy in any type of Drawing Editor drawing, you can count on measurement tools such as Dimension Add or Ruler or Construction Line Add using BSCL to reliably produce precise and consistent results in an unshortened drawing.
Optional : Set selection filters for the types of objects that you want to move or stretch. Be aware that if you set the ' End Points ' filter, all end points of that object must be selected -- otherwise the object will be stretched, compacted or skewed.
Optional : Use the Layer Panel to Show the layers that you want acted on.
Step 1 (preselection) is optional. If you don't do step 1, in-tool selection is required -- see note 2 .
|
|
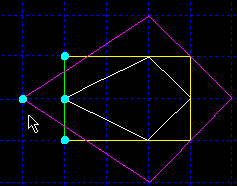
1 (optional) : Draw an area box to select the object(s) or end point (s) that you want to move or stretch. Use Select- if you want to deselect objects or end points. Use Select+ to select additional objects or end points.
|
|
|
2 . Invoke Move/Stretch . If you didn't do step 1, see note 2 before going to step 3.
|
|
|
3 . The status line prompts, " Locate a reference point :" Move your mouse pointer ( ) so that the point location target snaps to where you want the reference point, then left-click ( Locate ). INCL is the Locate option used in this example.
|
|
|
4 . The status line prompts, " Locate second point :" Position the point location target where you want the reference point to be moved, then left-click ( Locate ). INCL is also used in this example.
|
|
|
5 . The selected end points and objects move the direction and distance that the second point is from the reference point, resulting in the stretching of items with only one end point selected. You may or may not be prompted to confirm the move/stretch -- see note 3 .
|
Note 1: To invoke Move/Stretch :
▸ Click the Move/Stretch icon. The icon can be taken from the group named ' Edit -- Area Mode ' and placed on the ribbon.
▸ Move/Stretch can also be invoked using a keyboard shortcut , the context menu , or a mode . For the ' Lightning ' layout style, configuration of the interface is done using Customize Interface .
▸ With Area Mode mouse bindings active, left-click ( Move ).
Note 2: If you didn't do step 1 (preselection), then after step 2 you are prompted to use Select Item(s) mode for in-tool selection of the objects or end points that you want. Press the Enter key or right-click ( Menu ) and choose " OK " on the menu when you are ready to go to step 3.
|

|
bindings
|
Note 3: If User and Site Options > Drawings > " Confirm move/stretch " is checked, you are prompted to confirm the move/stretch and may relocate the second point if you so choose. If " Confirm move/stretch " is not checked ( ), you can still Undo if you do not like the results.